Review the Year 2013

It’s been more than a year now when I have first listed the Taipei Hackerspace in the hackerspaces directory, and set up the Facebook page. I wouldn’t have guessed that we get this far in such a short time, but I should have. It should be a good time ro recap things at this point.

2012 September: set up Hackerspaces.org + Facebook

2013 January: Tom reaches out to me, and gives the idea of doing a Hackerspace-themed event at Google before the Chinese New Year in two weeks time.

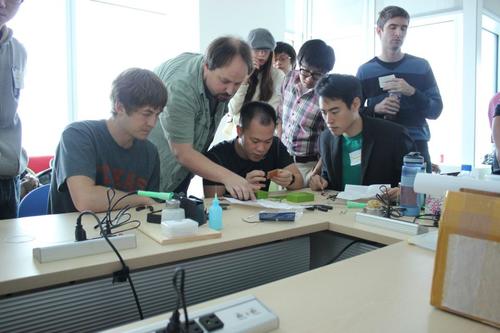
February: The Taiwan Maker Gettogether & Open Workshop, worked out beautifully, great people, 3 other Hackerspaces checking in over video, people learn to solder, and the hard core of the future hackerspace team is formed.

March: After about 1.5 months of looking, the team found a promising place near MRT Zhongshan Station / Taiyuan Rd. We rented it out, and at the end of the month, we celebrated that with the Hackerspace Potluck Cleanup Party. Still remember the big pile of food on the floor of the still completely empty main room…

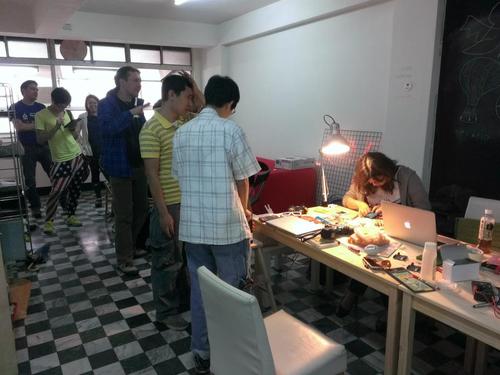
April: We have a blackboard wall. Held the first Open House event, to give a bit more structure to the space. Open house later became a regular event happening twice a month (2nd and 4th Tuesday usually)

May: First regular keyholder meeting: this helped move things forward quite a bit. We have participated in the Maker Faire Taipei: even if we just had a tiny half-table, a lot of conversation and interest sparked. We are on the right path.

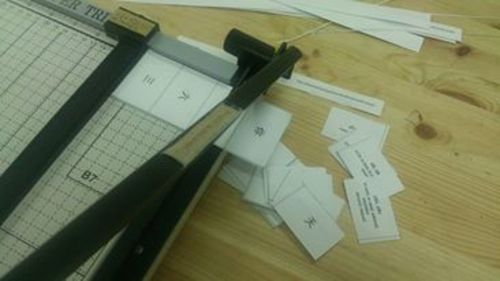
August: Instructables Build Night, Let’s Play Arduino - we start to organize more events for people to join, besides everyone just using the space for whatever project they might be building. Xintian’s ”Thankful Donation Jar” is featured on Instructables.

October: More events, this time less electronics and more open ended: Hacking Chinese, Publish Your First Ebook. We are still experimenting finding different audiences for our ideas.

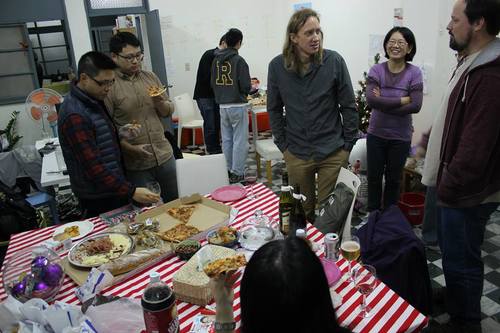
December: Another hackerspace opens at NTUST. We have applied to be a Taiwanese non-profit association - it’s still ongoing, steadily making progress. Throw a Christmas party. From this month, there are regular opening hours every evening, that people can rely on more.

I personally had a really great time, and learned a lot. Definitely can get more things done, feel more patient (sorry when this is not obvious), and picked up a lot of practical technology. Really enjoyed seeing people growing along with the place and the community.

For the next year, I’m looking forward to:

  • Learning to fundraise better - seen what other projects and people did, and we need to be better at soliciting support
  • Finish the non-profit application - that would make things more reliable, more official, more concrete. Also a lot of work, but something’s gotta give.
  • See more of my non-techie friends being inspired by the Hackerspace - I’m already amazed by the response so far
  • Build better connection with other hackerspaces around the globe
  • Make ourselves self-sustataining financially - absolutely necessary to secure the future of the space
  • See projects, companies, kickstarters launched based on work done in the space - there are already a few seeds for that

It’s going to be exciting. Thanks a lot all of you, regulars, visitors, supporters, fans, and mildly curious onlookers of the Taipei Hackerspace! Cheers for an even more active 2014!

Greg

Comments

Fixing a Headphone Jack

Fixing a headphone that has a broken jack is easier than many people think. Recently I had a friend bringing his favorite, but old, headphone to the Hackerspace to get it working again. It is back in action, and now here’s a quick quide of the steps taken, so other people can do something similar as well.

So, if your headphone connector does not have sound in either ear, or the cable has to be moved around near the jack to have sound, the inner cabling is likely broken there. It is probably the most sensitive part of headphones, not really a surprise.

Snip it: snip the old connector off near the jack. Go to Guanghua computer market or another computer store, to get a new jack that could be assembled. Make sure that the connector part (the metal area, the part plugged in) is the same length (from tip to metal base), and has the same number of metal bands.

"Snip the old jack off, took the leap"

Prepare the new jack: the connector should have some kind of outside cover, screw it off and thread the cable in it. If your cable has two lines attached to each other, separate them for 2-3cm length. Strip off the outside plastic cover with a wire stripper: I used AWG18 setting, or just “18”, be careful not to break off the little wire bundles inside.

In one of the lines you should see a green colored bundle and a copper colored one, that belongs to the left ear. The other wire should have a red bundle and a copper colored one, which belongs to the right ear. The color is coming from the enamel coating on the copper wire (even the copper colored one as well!), that is to insulate the wires from each other. This coating makes it a bit trickier to solder later, but not much harder.

The jack should have a couple of connectors exposed by the cover you’ve screwed off: the biggest one is the ground, that connects to the base of the plugged in area. The tip of the jack is the left ear, the second from the tip is the right. On the back, usually the middle electrode connects to the tip, the one further outside of the center is the second, and so on. If you are not sure which connects where, use a multimeter to make check the connections by touching the metal bands on the plug in area and the back.

"Preparing the new jack"

Ready to solder: can use a “third hand” to hold the jack. Roll the two copper colored lines (the ground lines) together and thread them in the ground connection (the large electrode), where there should be a hole. Using the soldering iron at normal temperature, add a bit of solder and keep it there for a bit.

The trick is that the hot solder will burn off the enamel coating, so that the electrode can have electronic contact with the wire. You have to heat it enought that the coating is burned off, but not too long that the plastic parts of the jack melt. Maybe a few shorter touches with the soldering iron and let it cool in between? Experiment a bit carefully.

"Ready to solder: view from below, the ground wires thread in"

Solder the signal lines: solder the green (left ear) wire to the electrode that connects to the center pin, and the red (right ear) wire to the one connecting to the one below the tip. Thread the line through the hole of the electrode, and do the enamel-burning trick. Make sure that the connector has enough time to cool down so you don’t end up melting it. Make sure you don’t leave connections between the electrodes.

"Solder the sides"

Test the connections: if everything is done well, then the tip band of the jack and the ground connection should have a low resistivity reading, that you can check with a multimeter. The same goes with the band below the tip. Check them out, so you can verify that your soldering has worked.

"Testing the connections"

Screw in the cover: now you have the jack cover that you thread in the wire in the beginning, now it’s time to scew it on - and hopfeully everything worked, if you missed that, you will have to start everything from the beginning. Later plug in / pull out the jack by that vcover to keep it safer and not break it again too easily.

"Screw in the cover"

Testing, testing: check it out with some music, make sure that both ears work - if not the soldering didn’t work, go back to that step. Make sure that the left and right side is correct (you can use for example an audio testing video on Youtube) - if not, switch the two sides by unsoldering them and doing it again.

"Testing the earphones"

And now, you should have a functional headphone again, that sounds good as new. Enjoy!

Comments

Instructables Build Night

Folloing a suggestion of a fan of the Hackerspace, we have signed up to the August Build Night, organized by the DIY site Instructables and the electronics store Jameco.

The deal is that they send us a bag of electronics, mostly around the classic 555 timer, and we build a bunch of diffnerent things that we afterwards upload as an instructable, helping others to make some cool stuff too.

Now we have received the bag, and we are getting ready to host the build night.

"The Instructables electronics pack"

The contents of the bag:

  • Standard Timer Single 8-Pin 555 Chip (10)
  • Resistor Assortment, 540 pieces (1)
  • Breadboard 3.25x2.125 (4)
  • Battery Snap, 6 inch (4)
  • Battery, Super Alkaline, 9V (4)
  • Grab Bag of Electronics Components (1)
  • LED Grab Bag - assorted colors and shapes (2)

August 17, Saturday afternoon 2pm

Build Night with Instructables & Jameco
Build some cool circuits and share it with the others. RSVP on Facebook or Google+.
When: 2013 August 17, Saturday, 2:00PM - 7:00PM
Where: Taipei Hackerspace, 太原路133巷26號4樓, Taipei, Taiwan

Feel free to bring friends, snacks, drinks with you, and have a good time! No entry fee, everyone’s welcome.

Comments

Full Steam Ahead

It’s been a while since this blog was written, and there are a lot of developments in the life of the Taipei Hackerspace. Finally we are a real “space”, having rented out a nice little 37 ping (~130 sq. m) appartment/office space, where we get access to a same sized roof as well.

You can see how it looked when we got it on this album.

Since then the place have seen a lot of donated furniture and tools, activities, people start to work on their projects. We had our first Open House, which got more people in, even if the place is open all other times as well.

"Our first Open House"

The address is 太原路133巷26號4樓 / Taiyuan Rd, Lane 133, No 26, 4th Floor, or here’s it on the Google Maps. Can ring +886-2-2550-7630 any time to see if anyone’s there, and come by if there is.

"Walking direction from MRT ZhongShan Station"

There are quite a few interesting projects goig on already:

  • Wireless Facebook like count display
  • Sous vide machine
  • Big bunch of LED works
  • Aquaponics
  • Robotics
  • Getting traffic and song list data from FM with Software Defined Radios (SDR)
  • DIY Radio telescope, and lab equipment

You can find more information on website, the Facebook and Google+ pages, and the mailing list. The code written for the projects will likely be in the Github repo for the ‘space.

Also thinking about doing a few training courses in programming, electronics, mechanical desig, photography, or whatever knowledge people would like to contribute.

So, what would you like to do?

Comments

Taiwan Maker Gettogether

Update 2

The photos from the event can be seen clicking here.

"Hard at work with microcontrollers and other goodies"

or you can see the whole timelapse:

Update:

The live hangout starts soon (10am Taipei time (UTC+8) click to see it in your time zone):

or watch directly on Youtube.

You can also join the hangout for different learning stations on Google+ hangout. Click on the names to join the hangouts!

(These will be live for the whole day, starting to do things around 12 noon Taiwan time)

First Hackerspace event - (and accidentally Groundhog Day too)

The purpose of this event is to get people interested in joining the first ever hackerspace in Taipei. We will be gauging interest in the hackerspace to help us select a large enough space that we can afford to open. This will also be a chance for the organizers to meet people that can help us find the perfect space. Our goal is to have the space ready for a Hack the Hackerspace event by the time Maker Faire Taiwan arrives in May.

Schedule

  • 10:00am Doors open
  • 10:30am - 10:50am Speaker: Mitch Altman - The Philosophy of Hackerspaces
  • 10:50am - 11:10am Speaker: Ben Heck - 3D Printing and Hardware Modding
  • 11:10am - 11:30am Speaker: Eric Stein - Creativity in the Hackerspaces
  • 11:30am - 12:00pm Speaker: Open floor - Hackerspace members answer questions
  • 12:00pm - 16:00pm Learning stations open
  • 16:00pm Doors close

Format

Google+ Hangouts The will be a main G+ Hangout that hackerspaces from around the world can join as a group. This will be displayed on the main screens at the event as well as smaller screen throughout the event. Local people will be able to interact with the members of the hackerspaces. This hangout will also be broadcast On Air. Will post the links here when the hangouts are set up

Learning Stations Each of the 4 learning stations will have a public G+ Hangout so anyone can join in to learn or teach. Each station will cover one topic that can be completed in about 30 minutes. Each station will have room for 4-6 local participants. The topics will be “Learning to Solder”, “Getting started with Arduino”, “Clothes Hacking”, and an open topic for the last station.

"40 soldering kits waiting to be assembled by someone tomorrow. 15 different ones to try. There are even some SMD kits!"

Introductions

The Speakers

Mitch Altman http://en.wikipedia.org/wiki/Mitch_Altman mitch@cornfieldelectronics.com (PUBLIC) A co-founder of Noisebridge, a hackerspace in San Francisco, and a pioneer of Virtual reality. Mitch has been featured many time is Make: and many other magazines.

Benjamin Heckendorn http://en.wikipedia.org/wiki/Benjamin_Heckendorn benjamin.heckendorn@gmail.com (PUBLIC) Console modder, internet celebrity, pinball enthusiast and designer, host of the Ben Heck Show. There are so many publications about Ben, I can’t even begin to count (Although Google say 3.9M hits!)

Eric Stein Programmer extraordinaire and insatiable hacker. Eric discovered the hackerspace PumpingStationOne when he was transplanted to Chicago. He immediately took an active role in the community and is now president of the space.

"Tools enough for 5 people at a time"

The Organizers

Gergely (Greg) Imreh imrehg@gmail.com Ex-pat living in Taiwan and founder of Taipei Hackerspace. He has been driving the online presence of the group.

Tom Haynes TaipeiHackerspace@tomhaynes.net (PUBLIC) Recently relocated to Taipei from San Francisco. After discovering Gergely through hackerspaces.org, they joined forces to found the physical space for Taipei Hackerspace.

The Media

Brian Song Make: Magazine Taiwan

Amber Yan Editor with Make: Magazine Taiwan

Caroline Hsu Head of Google Communications, Taiwan

Lan Chang Google Public Affairs Senior Associate, Taiwan and Hong Kong

Location

Google Taiwan office, Taipei 101, Floor 73. Meeting at Taipei 101 Ground Floor.

The event page on Google+ and on Facebook.

Comments

Radiation Counters

Recently I was thinking what kind of projects would fit the local environment the best, what technology and science related topics can be on people’s mind in Taiwan. One that keeps popping up is the issue of nuclear power and its dangers.

I’m a physicist, and the professors at my university had a relatively close contact with Hungary’s single nuclear power plant, and we had a good training about nuclear energy and engineering. Because of this it annoyed me to no end to see the “No nukes” slogens everywhere in Taiwan for a long time, mostly because I felt people misunderstood things - let’s start with that “nukes” are “nuclear weapons”, not nuclear power… The more I encountered the protests, and the more I thought about it, there’s a point, though. The biggest practical reason for people to oppose that technology is because its implementation here is bad: bad choice of location, bad management, bad practices. I don’t know whether it is really so, but those are at least sound things to discuss.

After the Fukushima disaster, I was in touch with a bit with the Tokyo Hackerspace and Freaklabs acting on their behalves. We sent some supplies there, and followed their project of making a lot of portable Geiger radiation counters. It was very impressive, and I do belive as well, that everything that makes people be better informed is a good ideas. It was covered in the Make: blog.

While searching for more about that project, I found Safecast, “a global sensor network for collecting and sharing radiation measurements to empower people with data about their environments.” Really think that Taiwan could use something similar.

So, how difficult it is to build a Geiger counter? Haven’t done one yet myself, from the tutorials on the net it looks relatively straightforward once one has the actual detector unit, while there is still space for innovation if someone wants to make more efficient, cheaper, or scrappy units.

bGeigie nano

bGeigie nano, really cool looking one on Google+, that kickstarted my recent thinking. Not much linked there, should find out more about this.

"bGeigie nano by Pieter Franken"

DIYGeigerCounter

DIYGeigerCounter is an entire kit with information, layout, parts and all

"the DIY kit"

Make Blog coverage of DIY Geiger Counters

There’s a big collection of DIY counters in another post on Make:. The whole spectrum is represented from prototipy to professional,

"Strawberry Linux counter"

Instructables

The Tweeting Geiger Counter was an entry to Adafruit+Instructables Make It Tweet Challenge. Those are two companies that should be very familiar to every maker anyways, I take a lot of inspiration from them.

Instructables have a few more related projects. Build a Pocket Ionizing Radiation Detector (PIRD) can be very handy to take it with you.

"Pocket Ionizing Radiation Detector"

The signal from the counter can also be used for other purposes, like interesting ways to decorate your environment like this one or this one.

"Geiger counter triggered LED decorations"

Also, Nixie-tubes just make everything look cooler.

"Nixe tube Geiger counter"

Build one

I’m pretty sure that there are much more versions than a quick research like this could bring up. On the other hand, the basics are pretty much the same for all of them, so the next step should be indeed to make one. Let’s see if there’s anything worrying in the air (hope not, but better to know:)

This would probably make a very good workshop as well - a bit of physics training, a bit of soldering, networking, data monitoring. Probably the biggest issue would be getting the parts, need to look into sourcing them, and not the eBay-type one-by-one, but somewhere where we can have a few.

Comments

Kicking Off the New Year

The Taipei Hackerspace project was in the back of my mind for years now, not really going anywhere, but I kept talking about it with people. From their reactions, and from things I heard discussed by others, there’s indeed a need and space for it, if it gets off the ground. Let’s make 2013 the year when that will happen.

In the last few monthts I have already got a log of interesting contact from people around the world - travellers coming to Taiwan, people moving here, and looking for a place to create. I can’t think of a better time doing that than now, and Taiwan has its unique properties that would make it a very hacker-friendly country.

"Preliminary Taipei Hackerspace Logo"

In the meantime, I just set up this blog to put a bit more pressure on me to get things going. Got together a silly logo already (with SVG source).

Also, there are some related projects that I created or took part, like OpenHack Taipei (the next event is coming up on 2013 Jan 12, Saturday evening!), or Geek Dinner.

So far things were managed on the Facebook and Google+ pages, I guess I will try to move things over here to the blog more, writing articles, calls for action, so forth. Those pages will remain, since most people are more exposed to FB and G+, and there are some great communities there too.

If you have any comments, just leave a note here.

Cheers, Greg

Comments